Printfriendly

About Me

My photo
Mother of 2 and wife to Travis.I am a Jill of all trades,master of none. I like to dabble in everything, so follow me on my journey; raising kids, working towards a healthier lifestyle, new recipes, menus, homeschooling, crafts,enjoying our home the Great Smoky Mountains, etc...What we call...LIFE :-)

Saturday, June 8, 2013

Fluffy Bathtub Paint


After making our Ivory Soap Cloud I wanted to find something to do with all the soap, so I searched around on Pinterest and found THIS post on making Fluffy Bathtub Paint!

So we started with the soap cloud, cups,boiling water, and food coloring.


Added the soap cloud to the mixer then added the boiling water, about 1/2 tsp at a time, you aren't using very much here so just add a little at a time.

When it's done it will have the consistency of yogurt.

Distribute the mixture between the 4 cups and add 2 drops of coloring in each cup.


Add the mixture to Ziploc bags, then cut off the corner of the bag to make like a frosting bag.


Give them to the kid in the tub and let them create!


Afterwards there will be lots of "floaters"  it's just soap and it will go down the drain with the water.


Both my kids (8 and 3) loved painting in the tub!

*This recipe is not enough for both kids to have enough, so keep that in mind if you have more than one child!

Thanks Housing a Forest

Friday, June 7, 2013

Ivory Soap Cloud


I have had my eye on this project since Wendy posted about it on Wendolonia.


Ivory soap floats in water, the reason it does is because it has a bunch of air whipped into itSo when you microwave it, those air bubbles expand, thus making your "cloud". 

We started with a small piece, just to see what we were in for. Sissy thought it would melt...She was very surprised! 


 We put it in the microwave and did 30 second intervals(about 3 times)...after a few seconds the bar started to grow and fluff out. 


The soap looks so soft and fluffy, almost like clouds, but surprisingly, the soap was actually still hard, crumbly and flaky, not at all how it looks,it's not really hot but still be careful! 


The kids were very excited
 

They played with it for a few minutes, it gets very flaky after its handled a lot. 


After reading in the comments on Wendys site, I saw someone suggest adding food coloring, we had some more to do so we decided to try that too! 


Sissy loved this one too! I did add a few more drops of coloring around it in between the 30 second intervals. 

This will be one that we do again, as the kids were amazed at how this worked! 

**Come back tomorrow to see what we are going to do with the soap cloud. 

Thursday, June 6, 2013

Play Dough Cars


My kids love to play with Play Dough, so when I saw THIS idea on Pinterest about recycling the caps from sauce packs we decided to try it out!

We pulled out the play dough box


They pulled out all the supplies they wanted to use

And we got busy!  
Start by making the body of the car and then add the wheels!It's that easy! 

I helped Brother make a "Lightning McQueen" car

Sissy decided she would rather just put the play dough around an actual car


Left is Lightning McQueen and Right is The King from "Cars"

This activity was lots of fun for the kids! This will be a great boredom buster! :-)

Sunday, June 2, 2013

YaYa's Strawberry Jam


I remember my mom making Strawberry Jam when I was a kid, I remember the smell and the "pop,pop,pop" we would hear from the kitchen. I wanted to learn how to do this myself, because #1 I love homemade jam and #2 because I like to know what's in the stuff we eat. So YaYa came and gave Sissy and I a lesson in Jam making!
I loved this recipe because it was very easy! The key is prep work, having everything measured and sanitized and ready to go!

Here is what you will need-

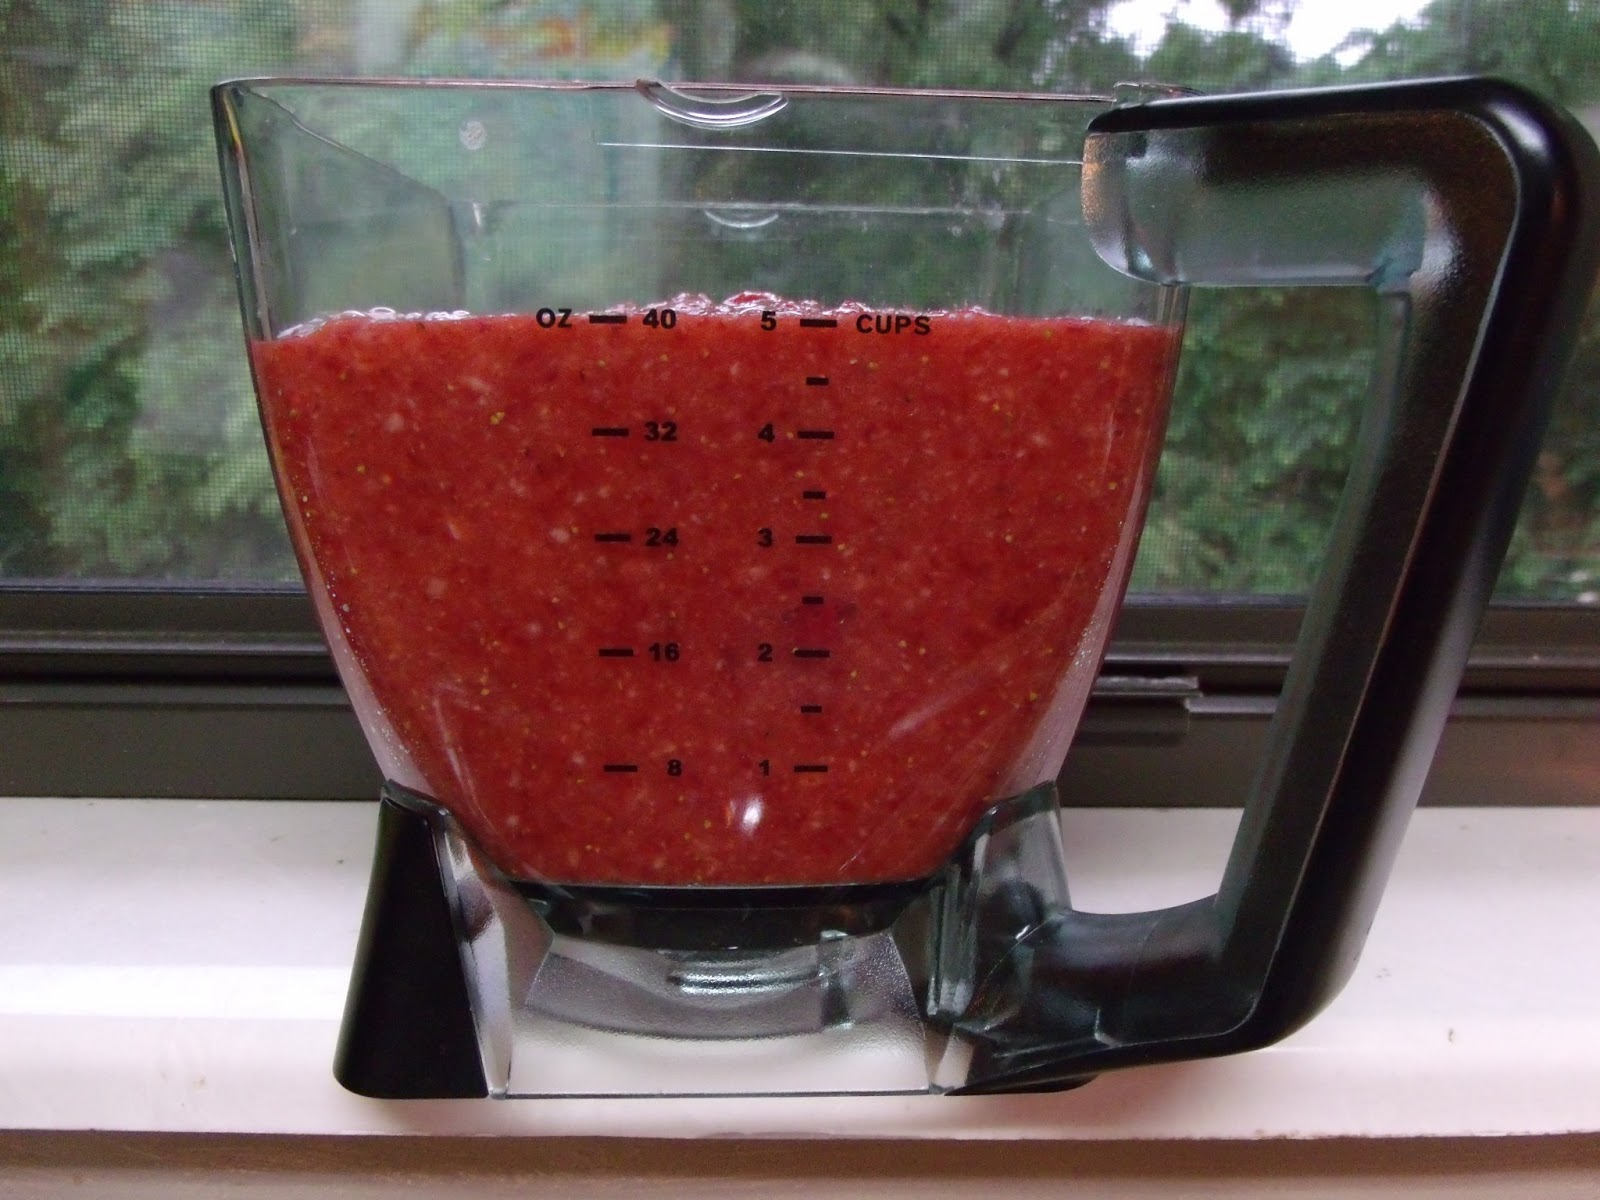
~Strawberries(A batch requires about 5 cups crushed strawberries, so you will need about 10 cups whole raw strawberries) Of course I would love to have strawberries from a "U-pick" farm, maybe next year!
~Sugar(7 cups-Domino Sugar-YaYa says it's better)
~Sure Jell (1 box)
~Butter

*Before you start make sure you have everything ready

~Jars with seals and rings
~Canning Funnel
~Fabric and Labels (optional)
~1 pot for the jars/lids
~1 pot for the jam
~Wooden Spoon
~Ladle
~2 Towels (1 for finished product, and one to use when filling jars)


1. Wash jars/seals and put them in a pot of hot water to sit until ready.


2. Measure out sugar in a separate bowl.

3. Wash your strawberries and hull them (cut off the green part on top, so nothing but fruit remains).


4. Now Crush the Berries. (There are different ways to go about crushing the berries; you can use a potato masher and mash them up OR you can put in a blender/food processor and crush them.)


5. Transfer the berries to a pot,add 1/4 tsp of butter and stir in the pectin,( continue stirring as you are adding the pectin)

(Sissy added pectin while YaYa stirred it up)

6. Bring mixture to a full rolling boil,stirring constantly, now add the sugar,continue stirring, return to a boil.


7. Boil exactly 1 minute, stirring constantly . Remove from heat. Skim off any foam. (As you’re stirring, a strange pink foam will form on top of your jam. It tastes delicious, but you don’t want that in your jam, ’cause then it won’t be gorgeously translucent. Use a spoon to scoop the foam off the surface of the boiling jam.


8. Ladle jam into jars. Wipe off the rim of the jar with a clean damp paper towel. 

9.Take a lid out if the hot water and place on jar. Screw on the rings. Put the jar upside down on a separate towel. 

Once all the jars are filled, turn them right side up and then leave them alone until they have all popped and set. 


While you are waiting on all those "pops" take the time to pop some biscuits in the oven and put that "foam" you skimmed off to good use...